

|
|
Building a Motorcycle LuggageTrailer
|
Although I had an interest in teardrops I was
intimidated by the prospect of building a camping trailer, even if it was a
small one. I had pretty well decided it was out of the reach of my abilities so
I had given up on the idea of a teardrop. Many months later a friend of mine told me she wanted a small trailer to pull behind her motorcycle but the price of trailers were out of her reach. I had seen some people who were using a small Harbor Freight trailer with a luggage pod mounted on it, so I suggested that as an alternative to the more expensive factory built trailers. That was the beginning of the motorcycle trailer project. After looking at a couple of the homebuilt trailers it was apparent that such a project was feasible. With a trip to Sears for the luggage pod and a trip to Harbor Freight for the trailer, we were well on our way. I figured the whole thing could be done in a weekend. Little did I know what I was getting into.... Once we unloaded the trailer box it was obvious that it weighed more than we had anticipated. I wanted the trailer to be as light as possible so it would pull easily behind the bike. 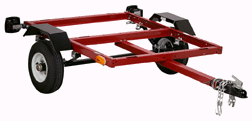 The second issue was that the trailer was significantly wider than the luggage pod. After some discussion I decided that it would be just as easy to weld up a new frame as it would be to rework the existing one. Although I was wrong about it being just as easy, the trailer frame ended up being significantly lighter than the original frame. 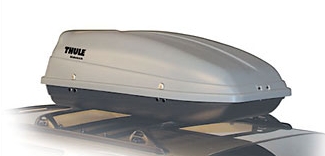 The new frame was made from 3/4 x 1 1/2 steel tubing. The frame is 6 inches narrower than the original which required me to narrow the axle by the same amount. Although it was a lot of work it was a perfect fit for the luggage pod. We decided that the original tongue would work if we added a bracket to hold the cooler. That finished the basic frame construction. 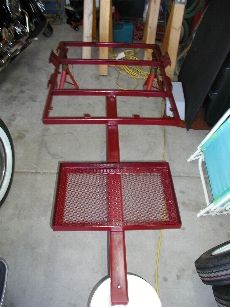 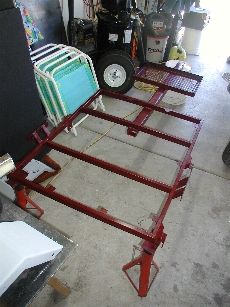 "The fenders were hung by the chimney with care." Oops, wrong story! Here are the fenders, springs and axle being painted. The seams in the fenders were welded closed and smoothed and the axle was narrowed 6 inches. We also removed one of the spring leaves to soften the ride. 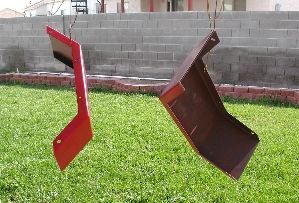 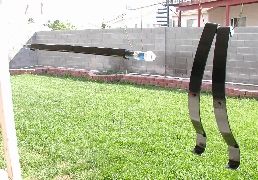 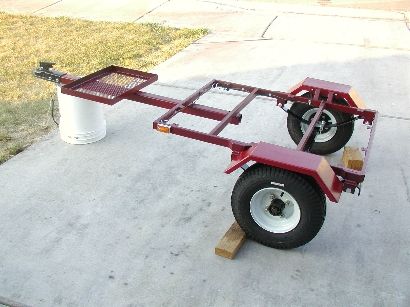 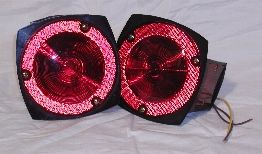 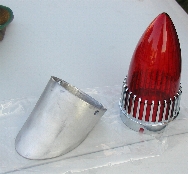 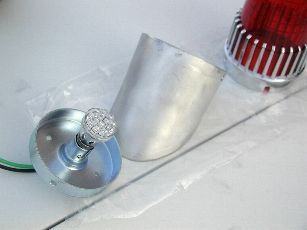 She gets lots of comments about the lights! 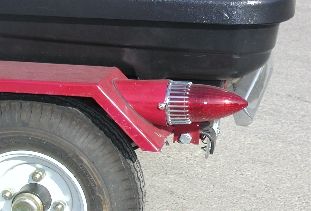 Since we were getting carried away anyhow, we decided to go a little further and add a rear bumper for the trailer. After wandering around the junkyard for a couple of hours we came across an old Chrysler that had a huge grill. The top trim piece of the grill was just the right shape for a bumper. All we had to do was cut it down and have it rechromed. (NOT!) Of course nothing is as easy as it sounds and the bumper was no exception. The trim piece was swept back at too great an angle to work as a bumper, but it looked really good at the front of the cooler frame. After cutting both ends off so it would fit the cooler I realized that I could weld the two remaining pieces together and it would be just right for the rear bumper! Sometimes luck is a strange thing. 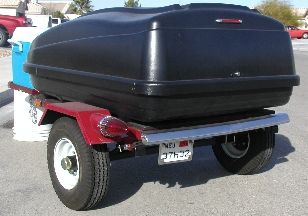 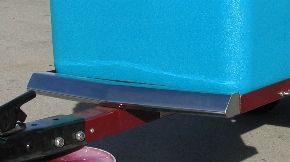 In the end the trailer looks pretty nice and works great. Although it was quite a bit of work, it cost about 1/3 the price of a manufactured trailer. Building the trailer was a lot of fun and gave me the confidence that I could tackle my own teardrop trailer. 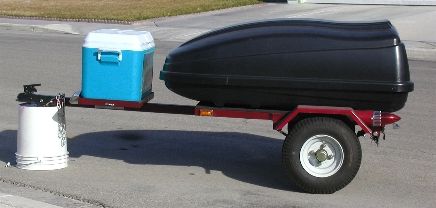 |