

|
|
Desert Dawg - Building the
Galley
Part
I
|
Here is a sketch to see how I want to organize the
galley. I am thinking about putting the ice chest on drawer slider so I can
pull it out from under the counter to open it without having to lift it out and
set it on the ground.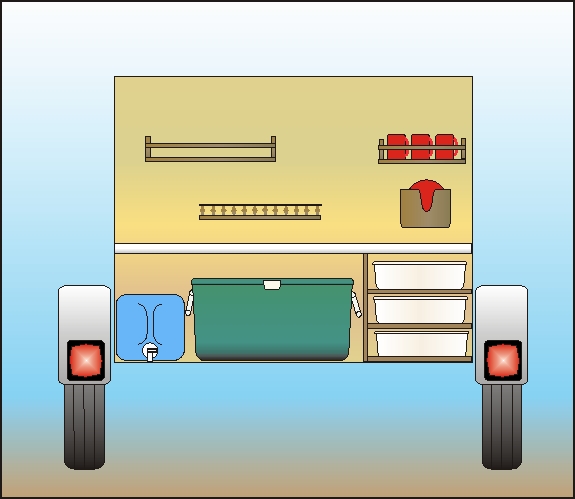 June 29, 2005 As shown in the drawing above, here are the items that will be located under the counter top. In this picture I'm making sure that everything is going to fit between the walls. The two plastic bins on the right will be my "drawers" that I will store all of my cooking utensils in. The bins are taller than the ones in my original drawing so I can only use two of them. 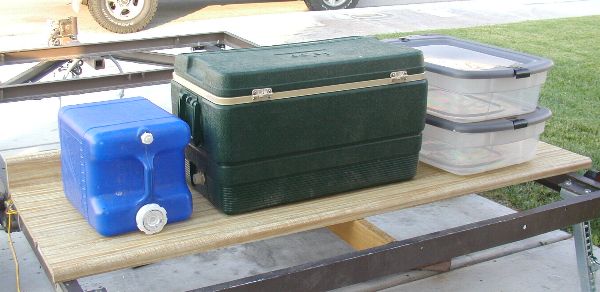 Well, I've purchased my counter top. I decided that a butcher block would look good in the trailer. I didn't want just a solid color and the imitation granite just wouldn't look right in the Desert Dawg. 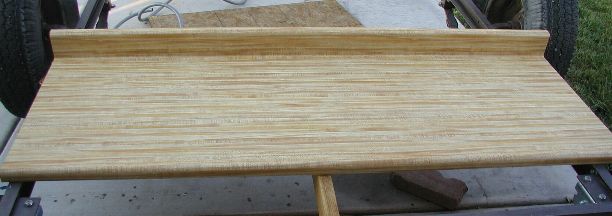 Once the side walls are installed then I can measure the exact width that I need to cut the counter top. In the mean time I've used it to help me visualize how the galley will be arranged. September 25-26, 2005 I'm getting closer to being able to work on the galley. Although the real work is still a ways away, some of the preliminary work is being done. The lower arrow points to the blocking where the galley counter is going to be mounted to. I have to build this pretty strong because of the potential weight of Dutch Ovens sitting on the counter. A few Dutch Ovens full of food can easily weigh 100 lbs. The upper arrow points to where the bulkhead will be that separates the sleeping cabin from the galley. 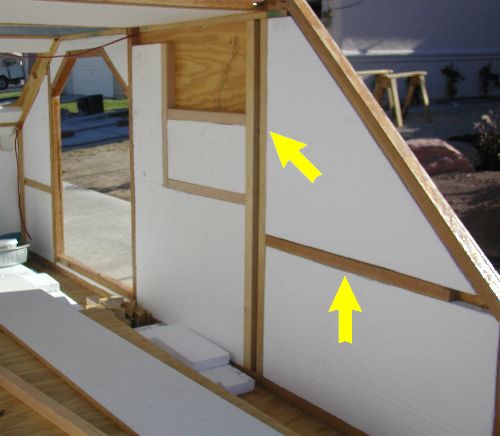 February 18-20, 2006 The long neglected galley is starting to see some light. I've made the framework for the bulkhead that divides the sleeping cabin from the galley. It won't be long before I can set the counter top in place an start to see if my vision for the galley will work out. As much as I've enjoyed working on the trailer up to this point, I think I'm most looking forward to building the galley. I enjoy camp cooking so I just can't wait to have a great cooking space!  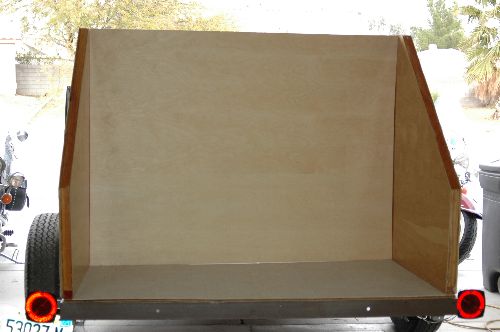 I am going to mount my stove under the counter on a drawer slide. That will keep it out of the way when I don't need it and will not take up any counter space with I do. I am also going to make a drawer to hold the ice chest so it can slide out from under the counter. Having the ice chest slide out will keep me from hurting my back loading and unloading the ice chest. 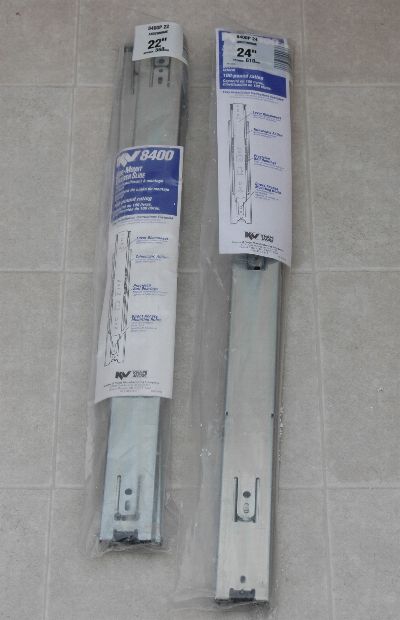 March 4-5, 2006 I've been able to make some progress in the galley this weekend. I want to insulate between the galley and the cabin but the wiring presents a bit of a challenge. The bulkhead is deep enough to take two layers of insulation, so I'll cut a channel for the wiring in the first layer and cover it all with the second. 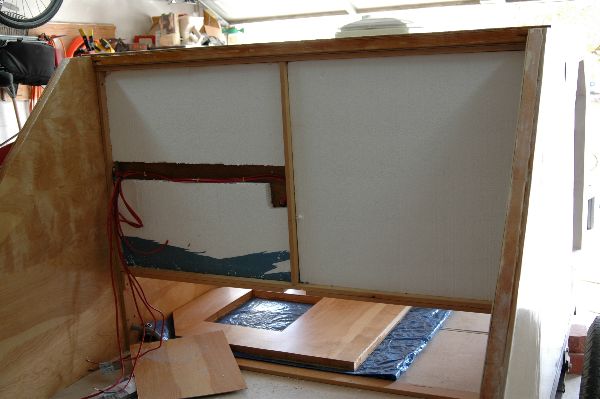 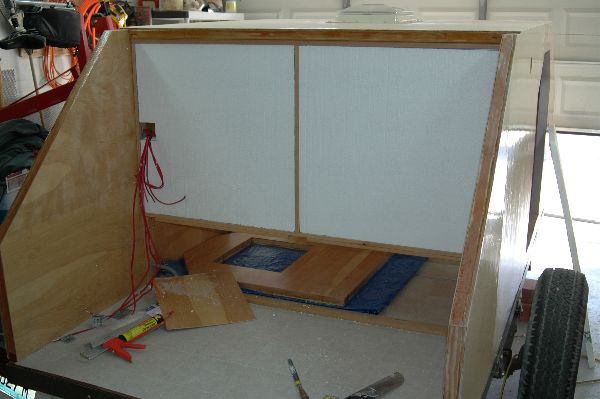 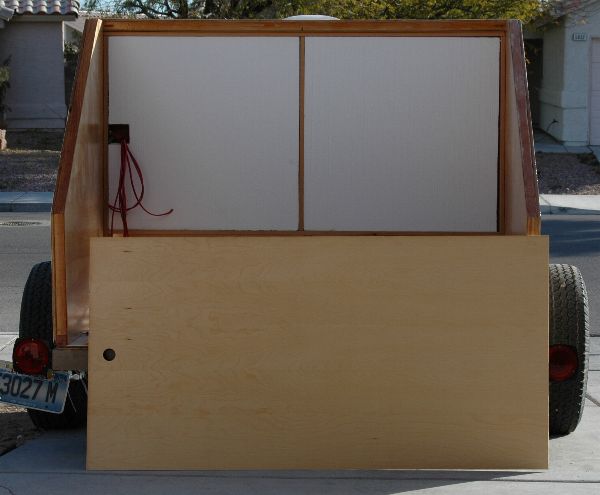 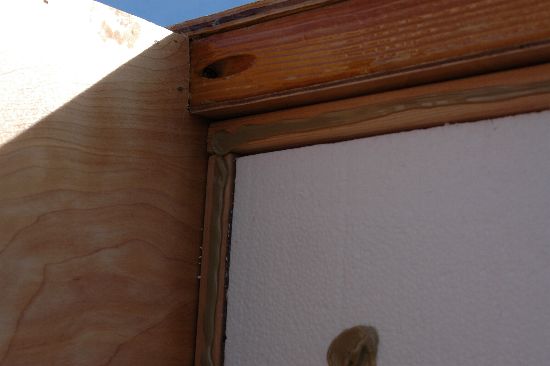 So what does isopropyl rubbing alcohol have to do with building a teardrop?? Well, it will remove uncured epoxy resin from your hands. It will also remove the polyurethane glue if you haven't allowed it to dry. Can't have too much of this around if you are a klutz like I am! LOL 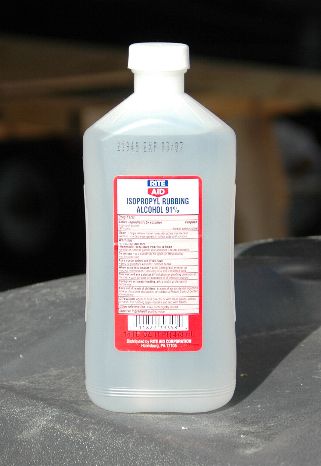 I purchased the birch plywood the walls a couple of months ago. I just bought the wood for the ceiling and the bulkhead. The earlier wood has very pretty grain to it, but the new wood has almost no grain at all. Be certain to buy all of your paneling at the same time if you care about getting a consistent look. 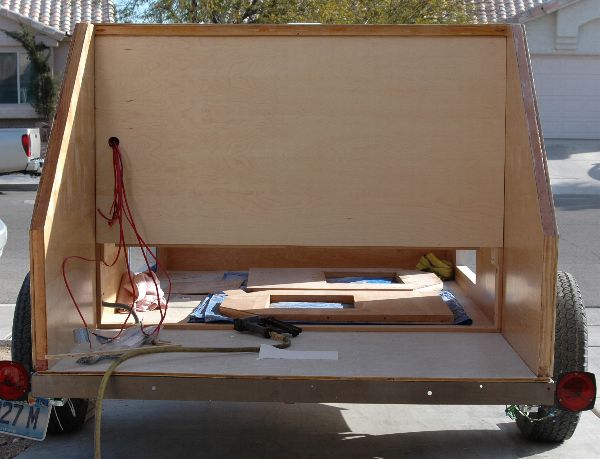  Well, next up is to install the counter top. Once the counter is cut and fitted into place, it will help me visualize how I want to finish the rest of the galley. I would like to have some counter top storage so have some thinking and planning to do. March 11-12, 2006 The galley is starting to really see some progress. With the bulkhead in place the galley space is starting to be clearly defined. I want to get the counter top cut to width and test fit. Having the counter in place, even temporarily, will allow me to start checking the fit of the stove, water jugs, storage bins, and ice chest. I have measured all of the pieces and they all seem to fit on paper, but I feel much better seeing them in place. I want to ensure that the counter top is level side-to-side as well as front-to-back. I've leveled the trailer as the first step in making sure everything is level. The cleat is screwed in place. The boards clamped to the wall represent the clearance needed for the hatch. 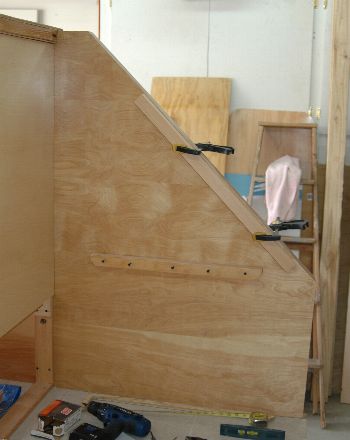 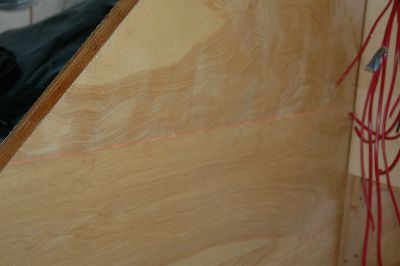 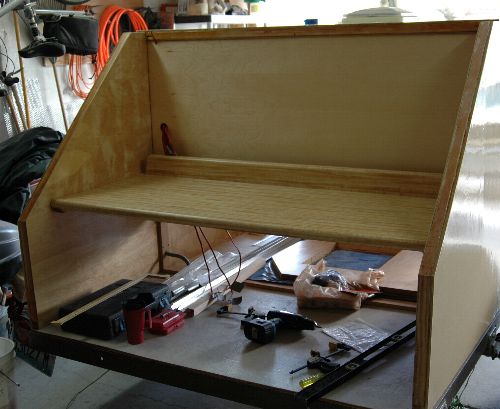 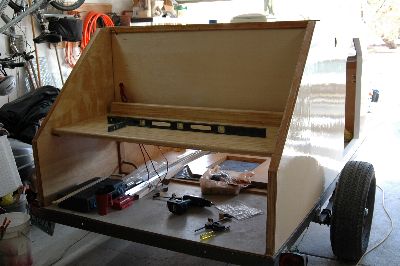 I'm going to mount the stove under the counter just above the water jug. The stove will slide out from under the counter on drawer slides. These are 100 pound slides so they should be plenty strong. I'm making sure the slides are long enough. 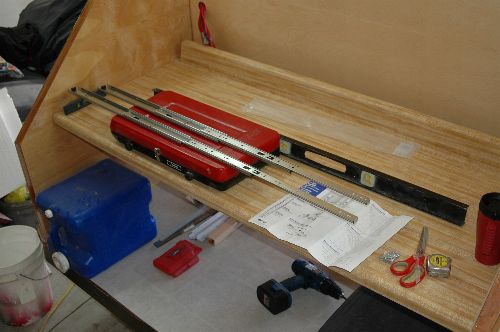 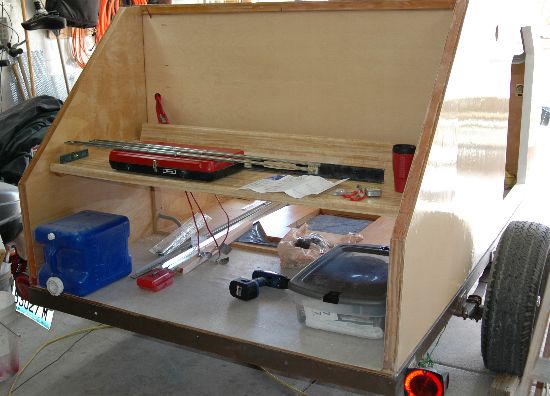 I'm really happy to see the galley starting to take shape. I will have to take the counter top back out for some final modifications and fitting, but next time it goes in should be the last. April 7 - 8, 2006 As I was designing the galley, I wanted to have a much counter space as possible. I enjoy cooking and don't like working in tiny spaces. I also wanted the counter top set as close to the rear of the trailer as possible so I don't have to lean over to reach it. This left a gap between the bulkhead and the rear of the counter top. Rather than being a problem to hide, this was an opportunity to create some much needed storage. Then I can store my coffee, flour, oil and other cooking essentials without them bouncing around and making a mess. I'm going to cut the backsplash off the counter then add a strip of wood that will fill in the gap. The storage area will be created by adding a piece of wood to replace the backsplash that I cut off. You are probably asking why I didn't just leave the backsplash alone? The answer is simple, I wanted enough space to put oatmeal, coffee, flour and other cooking essentials, and there wasn't enough room without changing things around. I used Poplar as the fill strip as well as the new backsplash. Two coats of Minwax stain and two coats of polyurethane makes it all look nice. Once again, the Kreg pocket jig has come in handy. Using glue and screws will ensure that the counter is strong and secure. 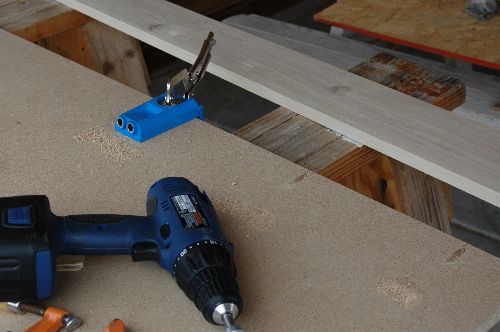 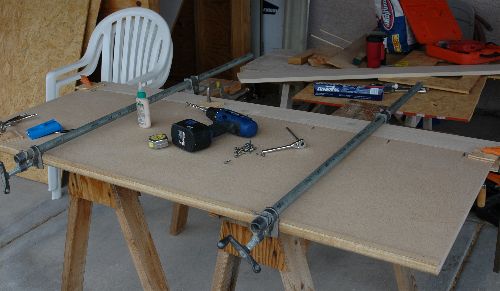 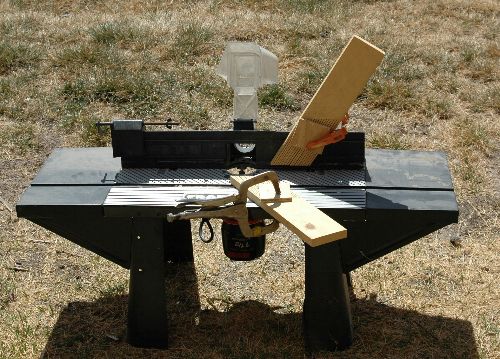 Here's a trial fit of the backsplash. The storage area that it creates is large enough to hold most of my cooking essentials. The clear container with the white top is my coffee container. There is actually a surprising amount of space between the bulkhead and the backsplash. 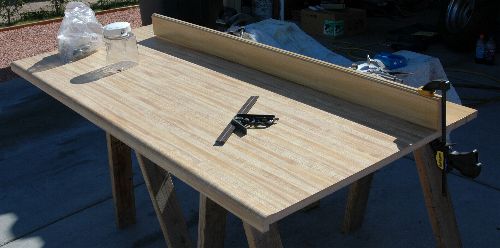 I've put a few items in the storage area to see how everything fits. Some non-skid mat in the storage area will keep things from sliding from side to side. 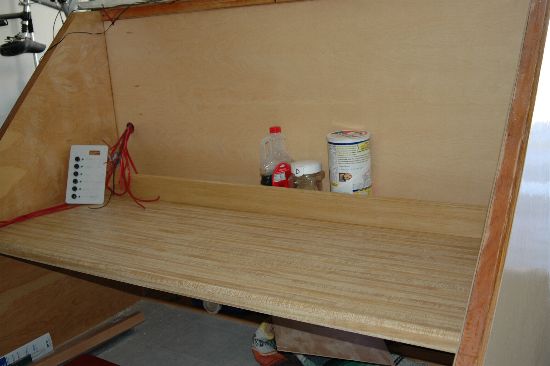 I want to make holders for plates, bowls and cups that can mount on the bulkhead. I may also make a small spice shelf to fit on top of the wiring box. August 6, 2006 I recently attended the Inaugural Redwood Gathering and had my first opportunity to see teardrop trailers in person. There were some really nice trailers there that had some great ideas.  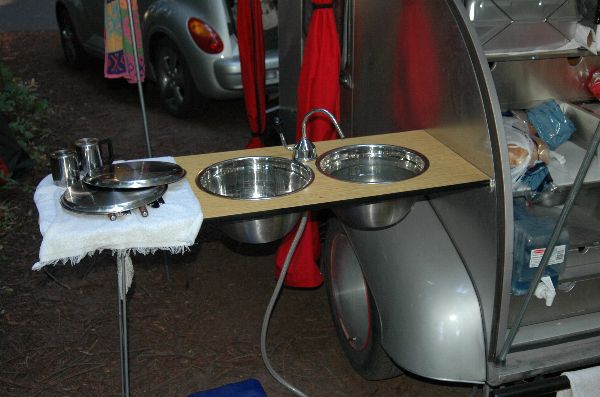 November 25, 2006 I can finally close up the underside of the galley. I put my new mattress in the cabin and anything else that needs to go into the cabin can go through one of the doors. I plan to make the everything below the counter so it can be removed if necessary. I don't plan on having to replace the mattress, but I want to be able to if the need arises. 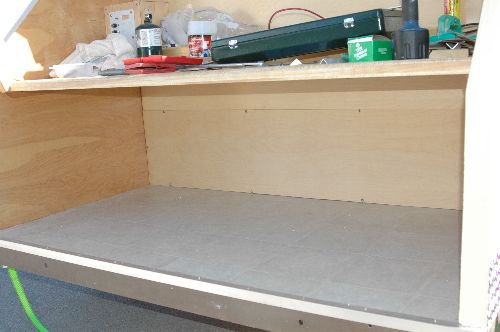 I enjoy music so I want to have a pair of speakers in the galley. I'm going to install an inexpensive car CD player in the cabin and run speaker wires to the galley. I scored two sets of these speakers for $50 a pair while I was out shopping this Thanksgiving weekend. One set will go in the cabin and the other set in the galley. 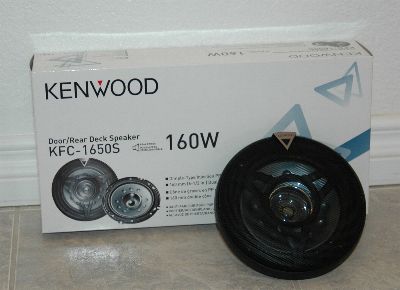 I used a template that came with the speakers to help me position the speakers where I wanted them. I marked the size of the speaker cutout then drilled a hole in the center.  My Dremel has a circle cutting guide that was EXACTLY what I needed to cut the openings. The guide has a pin that you can adjust to create the size hole that you want. I used the template to set the pin and away I went. 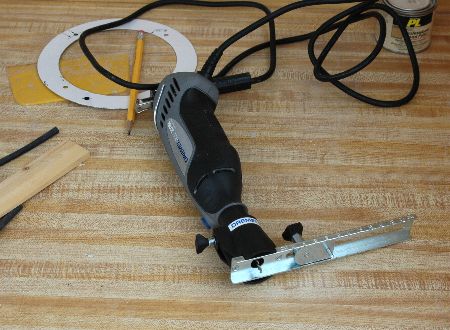 The Dremel did a great job! I set the depth of cut so it would just cut through the wood but not much of the styrofoam. I didn't want to have the cutter make a big mess. I used a keyhole saw to cut through the styrofoam. 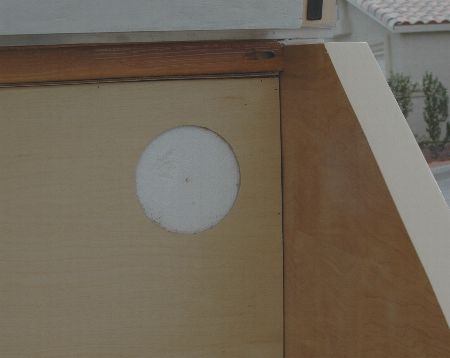 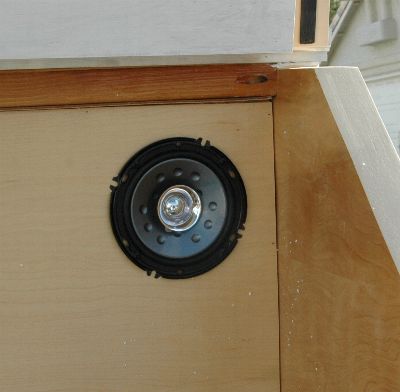 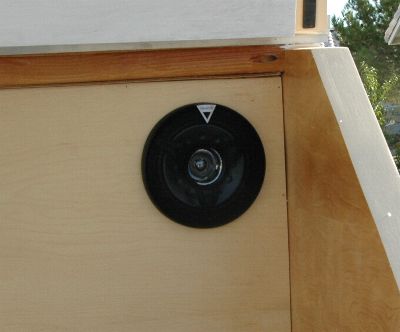 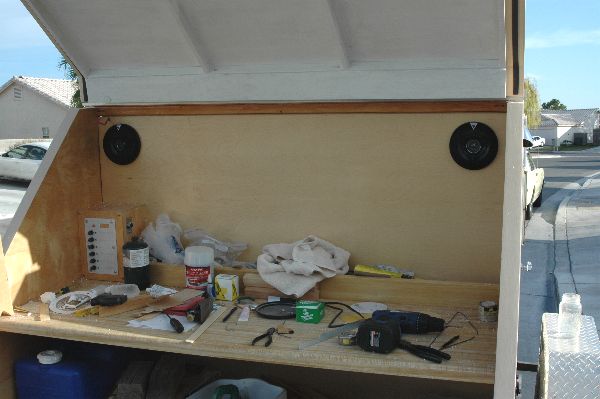 February 10 - 11, 2007 Ok, I'm finally getting back to work on the Dawg. One of the things that I really want to complete is the under counter shelf. I am using plastic bins for the drawers so it can be quite simple. Still, it will take a bit of work to do a nice job. One of the major factors that I have to consider during the design and construction of the shelf is that it must be removable in case I ever have to replace the mattress. The other factor I need to consider is that the vertical portion of the shelf provides support for the counter top. I like to cook in those cast iron Dutch Ovens and they are heavy! 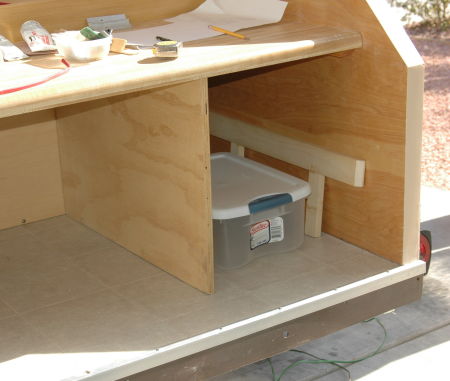 After looking through a couple of books on basic wood working, I decided to try to make a dado for the shelf to fit in. I don't expect there to be a lot of weight on the shelf, but the trailer will be bouncing down the highway so I want the shelf to be plenty strong. 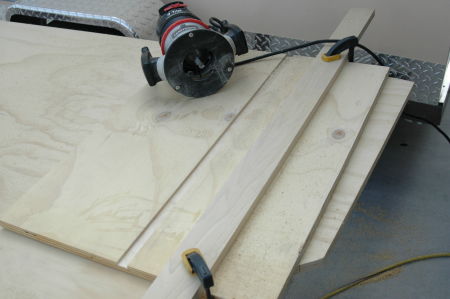 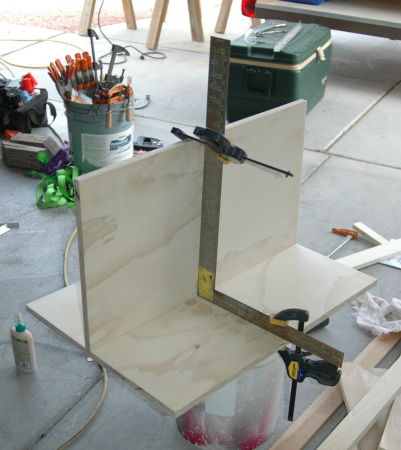 I'm going to use pocket screws to secure the shelf to the upright. It really is a bit of an over kill since the shelf is going to be glued into a dado. Still, I have the "cool tool" so I may as well use it. 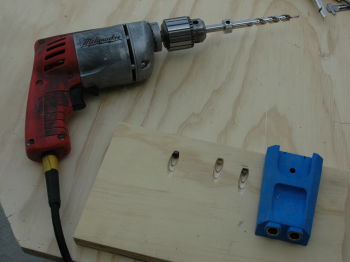 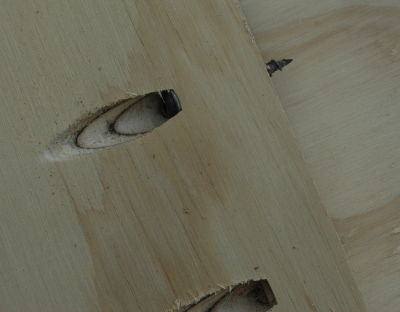 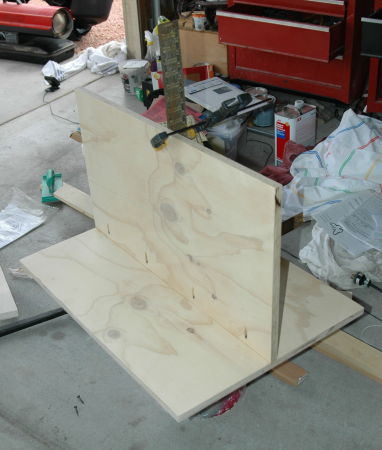 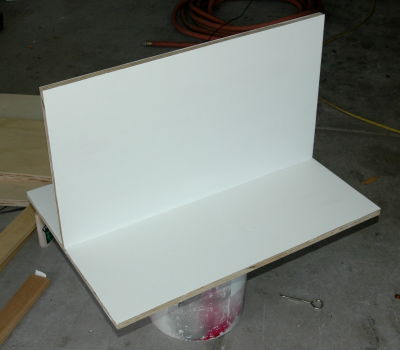 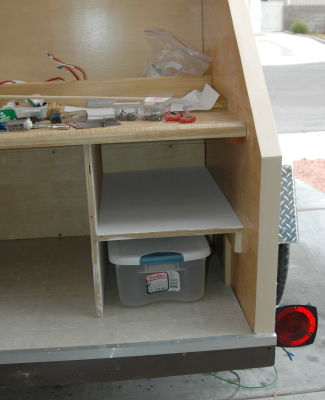 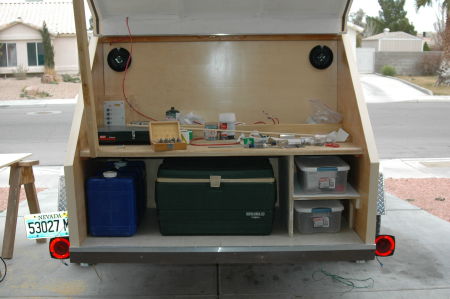 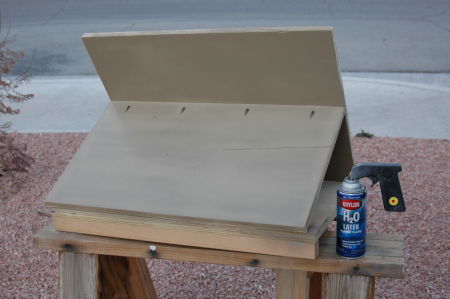 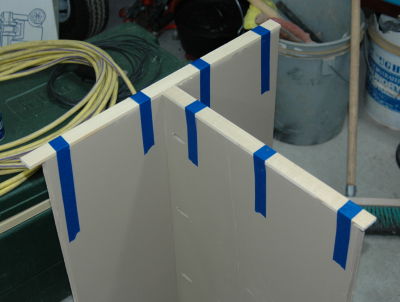 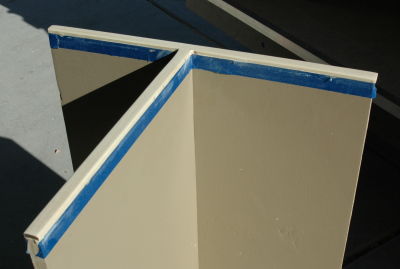 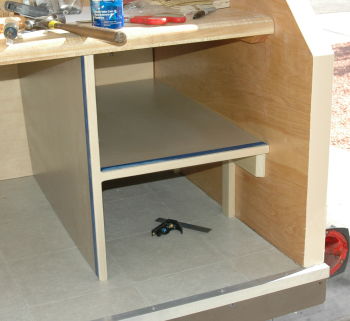 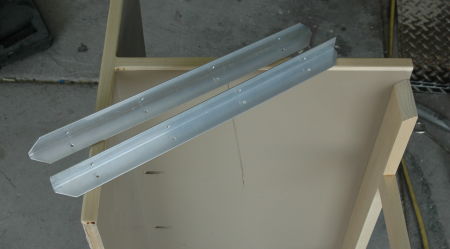 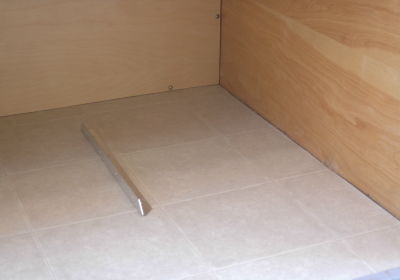 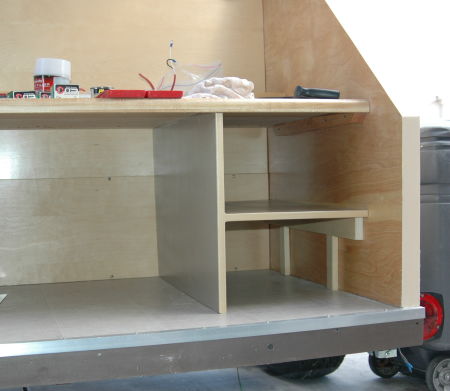 Although there is nothing difficult about this shelf, I tried a few things I've never done before and it turned out pretty well. It is nicely painted with a birch face and makes the galley look a little nicer. February 19, 2007 Although not technically part of the Desert Dawg build, I did find some new dishes for the trailer. These are really cute and will brighten up the galley. The price was right so if they get lost or broken it's not a big financial loss. 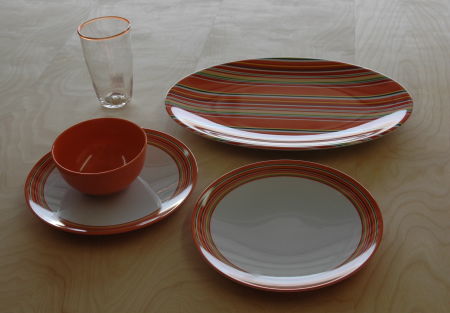 March 30 - April 1, 2007 I want to have a pull-out trays to hold my camp stove and ice chest. The pull-outs are a convenience items that will make cooking a bit easier. I have purchased heavy-duty drawer slides so they can handle the weight. The trays turned out to be quite a bit of work but I really like how they turned out. Let's get going! Each tray has a poplar frame around the outside and 1/2 plywood for the tray surface. The tray need to be strong because they will have to hold a lot of weight. I've decided to cut a dado in each frame for the plywood to fit into. I will use a router mounted in a table to cut the dado into the poplar frame. 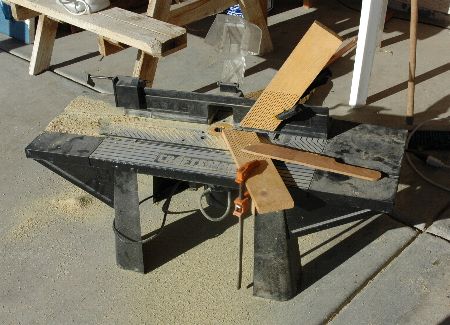 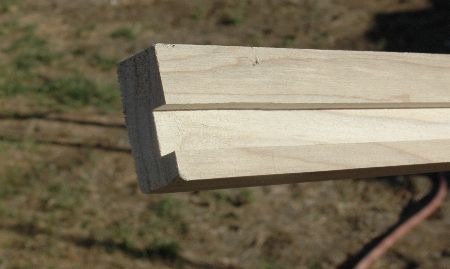 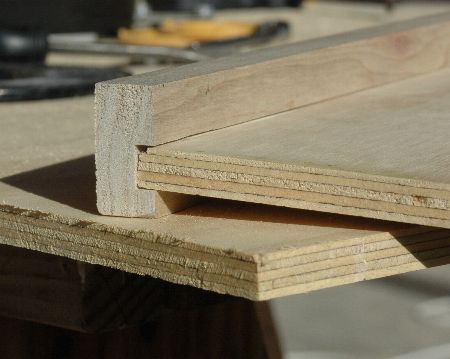 I want to show off natural wood whenever possible. The poplar frame looks good but the plywood is ugly. Just like the tray inside the cabin, I've decided to paint the plywood portion of the tray a light brown and leave the poplar frame it's natural color. 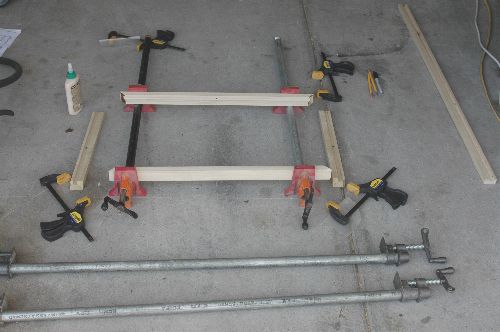 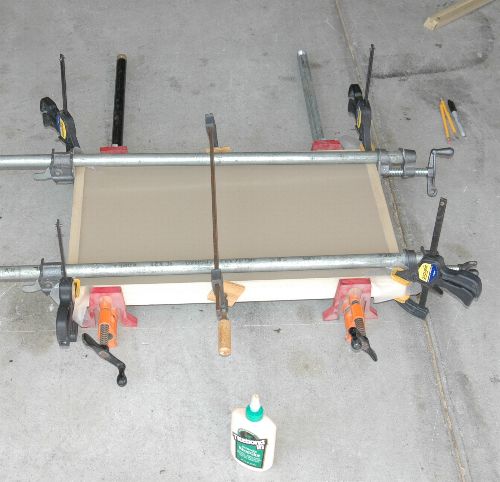 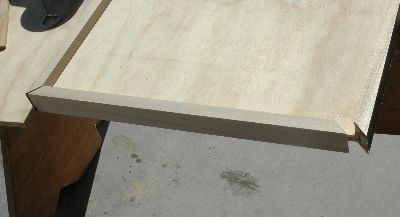 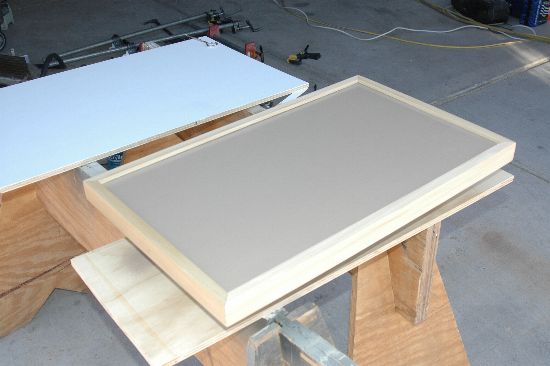 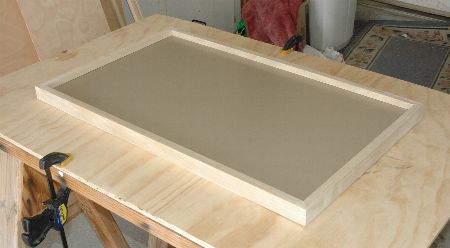 |